Dr. Brown’s Sterilizer and Dryer: A Comprehensive Manual Guide
Navigating the digital landscape reveals discussions on Windows 11, Microsoft 365, and software like GParted. These topics, while distinct,
highlight the importance of comprehensive guides and troubleshooting for modern technology, mirroring the need for this manual.
Welcome to the world of simplified baby care! This manual serves as your comprehensive guide to operating the Dr. Brown’s Sterilizer and Dryer, a vital tool for ensuring the health and safety of your little one. Like navigating complex systems such as Windows 11 or utilizing partitioning software like GParted, understanding your sterilizer requires a clear, step-by-step approach.
Maintaining impeccable hygiene for bottles, nipples, and accessories is paramount in a baby’s first months. The Dr. Brown’s Sterilizer and Dryer offers a convenient, efficient, and reliable solution, eliminating harmful bacteria and thoroughly drying items to prevent mold and mildew growth. Just as the Dr; Windows community provides support for Microsoft products, this manual aims to provide you with all the information needed for optimal performance.
This guide will walk you through each function, from initial setup and loading procedures to understanding the sterilization and drying cycles. We’ll also cover troubleshooting, cleaning, maintenance, and safety precautions. Think of it as your dedicated resource, similar to the FAQs and installation guides available for Windows 11, ensuring a smooth and worry-free experience.
Understanding the Components
Familiarizing yourself with the Dr. Brown’s Sterilizer and Dryer’s parts is crucial for effective operation. The unit comprises a main housing, a removable sterilization tray, and a drying rack. A key component is the steam vent, essential for releasing steam during the sterilization cycle – much like updates are essential for Windows 11 functionality.
The heating plate at the base generates the steam, while the integrated fan facilitates the drying process. A filter system, requiring periodic replacement, purifies the water used for sterilization. Consider this filter akin to the disk partitioning tools in GParted; both require maintenance for optimal performance.
The control panel features intuitive buttons for cycle selection and start/stop functionality. An LCD display provides cycle status and error code information. Like the Microsoft 365 suite, each component works in harmony. Understanding these elements, and their interplay, will empower you to troubleshoot issues effectively, mirroring the support found within the Dr. Windows community. Proper component knowledge ensures safe and efficient use, safeguarding your baby’s health.
Setting Up Your Sterilizer and Dryer
Before first use, unpack the Dr. Brown’s Sterilizer and Dryer and inspect all components for damage. Place the unit on a stable, level surface, ensuring adequate ventilation around the steam vent – similar to ensuring sufficient space for hardware installations discussed on Dr. Windows.
Fill the water reservoir with distilled water to the indicated ‘max’ line. Do not overfill. Insert the sterilization tray and drying rack securely. Connect the power cord to a grounded outlet. Just as a bootable stick requires correct creation, proper setup is vital.
Run a cleaning cycle (without any items inside) as per the ‘Cleaning and Maintenance’ section to remove any manufacturing residue. This initial cycle primes the system. Like installing Microsoft 365, a clean start is recommended. Familiarize yourself with the control panel and cycle options. Ensure the unit is properly grounded for safety, mirroring the importance of secure systems discussed in tech forums. A correctly set-up sterilizer is the foundation for effective sterilization and drying.
Loading the Sterilizer and Dryer
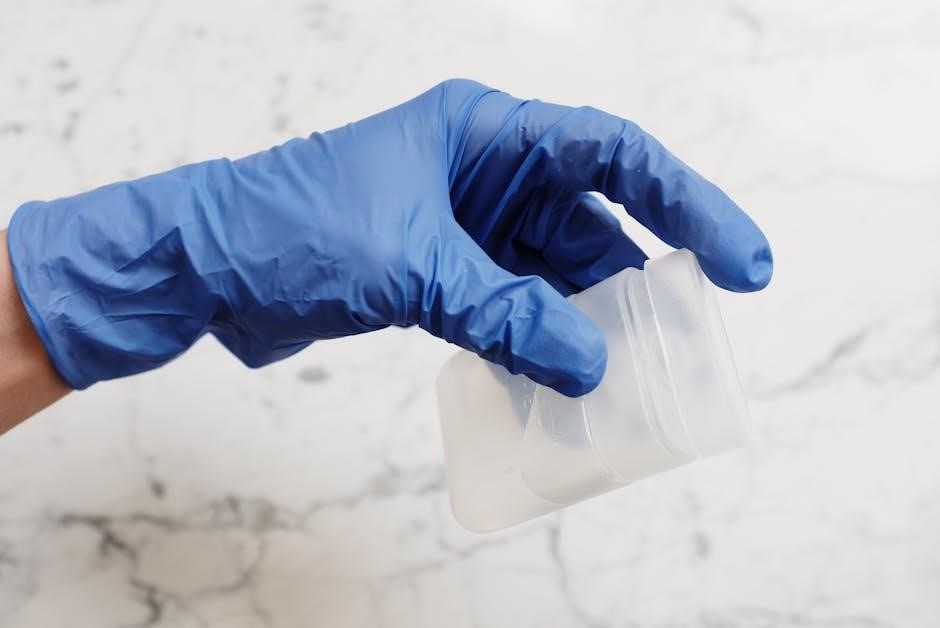
Ensure all items are thoroughly cleaned before loading. Disassemble bottles, nipples, and other components. Arrange items on the sterilization tray, ensuring they don’t touch each other – allowing steam to circulate effectively, much like partitioning a hard drive with GParted requires careful arrangement.
Place smaller items (nipples, pacifiers) in the designated small item container. Avoid overcrowding; this can hinder sterilization. Securely position the drying rack above the sterilization tray. Load items onto the drying rack, leaving space between them for airflow, similar to ensuring adequate ventilation for computer hardware.
Do not load metal items directly next to plastic, as this could cause damage. Refer to the ‘Safety Precautions’ section for a complete list of incompatible items. Like troubleshooting Windows 11 issues, understanding limitations is crucial. Close the lid firmly to initiate the cycle. Proper loading maximizes the sterilizer’s efficiency and ensures thorough cleaning and drying, mirroring the importance of a well-organized system.
Sterilization Cycle Explained
The sterilization cycle utilizes high-temperature steam to eliminate harmful bacteria and germs. Upon initiating, the sterilizer heats water, converting it into steam. This steam is then circulated throughout the chamber, penetrating all surfaces of the loaded items – a process akin to a deep system scan for viruses, like those addressed in Microsoft 365 security updates.
The cycle duration varies depending on the selected setting (see ‘Combined Sterilization and Drying Cycle’). During operation, the unit may produce some noise, which is normal. Avoid opening the lid mid-cycle, as this releases steam and compromises sterilization effectiveness. Like maintaining a stable Windows 11 environment, consistency is key.
The sterilizer automatically shuts off once the cycle is complete. A visual indicator (light or sound) will signal completion. Allow items to cool completely before handling, as they will be hot. Proper sterilization is vital for infant health, mirroring the importance of reliable software like GParted for data integrity.
Drying Cycle Explained
The drying cycle employs heated air to thoroughly dry sterilized items, preventing bacterial regrowth. Following the sterilization phase, or as a standalone function, the unit introduces warm, filtered air into the chamber. This air circulates, evaporating any remaining moisture – a process similar to optimizing system performance, as discussed within the Dr. Windows community.
The drying time is adjustable, offering options for varying load sizes and material types. Like managing partitions with GParted, customization is beneficial. Ensure adequate ventilation around the unit during operation to facilitate efficient moisture removal. Avoid overloading the sterilizer, as this can hinder proper drying.
The cycle concludes automatically, indicated by a signal. Items will be warm to the touch. Regular use of the drying cycle contributes to maintaining hygiene, much like consistent software updates enhance security, mirroring Microsoft’s focus on Windows 11 stability.
Combined Sterilization and Drying Cycle
This integrated cycle streamlines the process, offering both sterilization and drying in a single, automated operation. Initiating this mode eliminates the need for manual transfer between cycles, saving time and minimizing potential contamination – a benefit akin to the efficiency gains sought by users optimizing their Windows 11 installations, as discussed on Dr. Windows.
The unit first executes the sterilization phase, utilizing high-temperature steam to eliminate bacteria and viruses. Once sterilization is complete, it seamlessly transitions into the drying cycle, employing heated, filtered air to remove all traces of moisture. This comprehensive approach ensures items are ready for immediate use.

Cycle duration varies based on selected settings and load size. Monitoring the progress is straightforward via the integrated display. Like troubleshooting software issues, understanding the cycle’s phases is key. This combined function provides a convenient and effective solution for maintaining optimal hygiene, mirroring the all-in-one approach of Microsoft 365.
Troubleshooting Common Issues
Encountering issues? This section addresses frequently reported problems and provides solutions. If the unit fails to power on, verify the power cord connection and outlet functionality – a basic step, much like checking bootable media when installing Windows, as detailed on Dr. Windows.
For sterilization failures, ensure proper loading (see ‘Loading the Sterilizer and Dryer’) and sufficient water levels. If drying is ineffective, check the filter for blockages (refer to ‘Replacing Filters’). Error codes (see ‘Understanding Error Codes’) provide specific diagnostic information.
Persistent condensation may indicate a faulty heating element, requiring professional service. Unusual noises could signal a mechanical issue. Remember, just as the VeraCrypt developers faced hurdles, sometimes complex problems require expert attention. Always unplug the unit before attempting any internal inspection. Like navigating Microsoft 365 quirks, patience and methodical troubleshooting are essential.

Cleaning and Maintenance
Regular cleaning ensures optimal performance and longevity of your Dr. Brown’s Sterilizer and Dryer. After each use, empty any remaining water and wipe down the interior with a soft, damp cloth. Avoid abrasive cleaners, as they can damage the surfaces – a principle akin to carefully partitioning disks with GParted, as discussed on Dr. Windows.
The sterilizer plate should be cleaned regularly to prevent mineral buildup. Refer to ‘Descaling the Sterilizer’ for detailed instructions. The drying fan vent should be checked periodically for dust accumulation, ensuring efficient airflow. Like maintaining a clean Windows 11 installation, preventative care is key.
External surfaces can be wiped with a mild detergent solution. Ensure the unit is unplugged and completely dry before reassembling. Consistent maintenance, similar to keeping Microsoft 365 updated, prevents future issues and extends the product’s lifespan. Neglecting these steps can lead to reduced efficiency and potential malfunctions.
Descaling the Sterilizer
Over time, mineral deposits from water can accumulate inside the sterilizer, reducing its efficiency. Descaling removes these deposits, ensuring optimal steam production. Use a descaling solution specifically designed for steam appliances – follow the solution’s instructions carefully. A diluted citric acid solution can also be used as an alternative, mirroring the problem-solving approach found in the Dr. Windows community.
Pour the descaling solution into the water reservoir, ensuring it reaches the maximum fill line. Run a complete sterilization cycle without any bottles or accessories inside. Afterwards, run two additional cycles with fresh water to thoroughly rinse away any remaining descaling solution. This is crucial, much like a clean disk partition with GParted.
The frequency of descaling depends on your water hardness; monthly is recommended for hard water areas. Ignoring descaling can lead to reduced steam output and potential damage, similar to neglecting updates in Windows 11. Regular descaling maintains peak performance and extends the sterilizer’s life.

Replacing Filters
The Dr. Brown’s Sterilizer and Dryer utilizes filters to remove impurities from the air during the drying cycle, ensuring bottles are dried with clean, filtered air. Regular filter replacement is vital for maintaining hygiene and preventing the buildup of bacteria. Similar to maintaining a clean system with tools like GParted, filter upkeep is essential for optimal function.
To replace the filters, first, ensure the sterilizer is unplugged and completely cool. Locate the filter compartment, usually at the back or base of the unit. Open the compartment and remove the old filters. Note their orientation for correct re-installation. Insert the new filters, ensuring they are securely in place.
Filter replacement frequency depends on usage; typically, every 3-6 months is recommended. Increased usage or a dusty environment may require more frequent changes. Ignoring filter replacement can compromise drying performance and potentially introduce contaminants, mirroring the issues addressed in the Dr. Windows forums regarding software stability.
Safety Precautions
Prioritizing safety is paramount when operating the Dr. Brown’s Sterilizer and Dryer. Always unplug the unit before cleaning or performing maintenance, similar to disconnecting hardware before partitioning with GParted. Never immerse the sterilizer base in water or any other liquid; this poses a serious electrical hazard.
Ensure the unit is placed on a stable, heat-resistant surface away from flammable materials. Keep the sterilizer out of reach of children. Allow the unit to cool completely before handling sterilized items, as they may be hot. Do not operate the sterilizer if the power cord or plug is damaged.
Regularly inspect the unit for any signs of damage. Avoid using harsh chemicals or abrasive cleaners, as these can damage the sterilizer. Like troubleshooting issues discussed on Dr. Windows forums, addressing potential hazards proactively prevents accidents. Improper use voids the warranty and may create unsafe conditions; Always follow the instructions outlined in this manual.

Understanding Error Codes
The Dr. Brown’s Sterilizer and Dryer utilizes error codes to indicate specific malfunctions, much like diagnostic tools used in software like GParted for disk partitioning. An “E1” code typically signals a heating element failure, requiring professional service. “E2” indicates a low water level, necessitating refilling before restarting the cycle.
“E3” suggests an issue with the steam sensor, potentially requiring descaling or component replacement. If the display shows “E4”, it points to a door locking mechanism problem – ensure the door is securely closed. Error codes “E5” and “E6” relate to temperature sensor malfunctions, demanding immediate cessation of use and professional assessment.
Refer to the troubleshooting section for potential solutions. Similar to the Microsoft 365 installation issues discussed online, sometimes a simple reset resolves the problem. If an error persists after attempting recommended fixes, contact customer support with the specific error code for efficient assistance. Ignoring error codes can lead to further damage or unsafe operation.
Frequently Asked Questions (FAQ)
Q: Can I sterilize all bottle types? A: Yes, the sterilizer accommodates most standard baby bottles, nipples, and accessories. However, check compatibility with uniquely shaped items.
Q: How often should I descale the unit? A: Descale every 1-3 months, depending on water hardness, similar to maintaining optimal performance in software like GParted. Hard water causes mineral buildup.
Q: What if the drying cycle isn’t effective? A: Ensure proper ventilation and avoid overcrowding. Check the fan filter for obstructions. Like troubleshooting Windows 11 issues, a simple fix often exists.
Q: Is the sterilizer safe for use with breast pump parts? A: Absolutely, it’s designed for comprehensive hygiene, including breast pump components.
Q: What does the error code “E1” mean? A: Refer to the “Understanding Error Codes” section for detailed information. Just as Microsoft addresses software bugs, understanding error codes is crucial.
Q: Where can I find replacement filters? A: Visit our website or authorized retailers. Maintaining filters ensures optimal performance.
Warranty Information
Dr. Brown’s Sterilizer and Dryer is warranted against defects in materials and workmanship for a period of one (1) year from the date of original purchase. This warranty extends to the original purchaser and is non-transferable.
This warranty covers repair or replacement of the product, at our discretion, should it prove defective under normal use. Damage resulting from misuse, abuse, unauthorized repair, or acts of God is not covered;
To make a warranty claim, please contact our Customer Support team (see details below) with proof of purchase. We may request you to return the product for inspection.
Like software updates addressing issues in Windows 11, we continually strive to improve our products. This warranty reflects our commitment to quality and customer satisfaction;
This warranty is in lieu of all other warranties, expressed or implied. Some states do not allow limitations on implied warranties, so this limitation may not apply to you.
Retain your proof of purchase for warranty service. Proper documentation is essential for a swift resolution.
Customer Support Contact Details
For assistance with your Dr. Brown’s Sterilizer and Dryer, our dedicated Customer Support team is available to help. We understand that navigating new technology, much like troubleshooting Windows 11 issues, can sometimes be challenging.
You can reach us via the following channels:
- Phone: 1-800-DR-BROWN (1-800-372-7696) – Available Monday-Friday, 9 AM to 5 PM EST
- Email: support@drbrowns;com – We aim to respond to all email inquiries within 24-48 hours.
- Website: www.drbrowns.com/support – Visit our comprehensive support page for FAQs, troubleshooting guides, and downloadable resources.
Our online resources, similar to the Dr. Windows community forum, offer a wealth of information and peer-to-peer support.
Please have your model number and date of purchase readily available when contacting us. This will help us expedite the support process.
We are committed to providing excellent customer service and ensuring your satisfaction with our products.
Alternative Sterilization Methods
While the Dr. Brown’s Sterilizer and Dryer offers a convenient and efficient solution, several alternative methods can effectively sterilize baby bottles and accessories. Understanding these options provides flexibility, much like choosing between different software installations, such as Microsoft 365’s classic Outlook versus the new version.

Boiling: Submerge items in boiling water for 5 minutes. Ensure all parts are fully immersed. Allow to air dry on a clean surface.
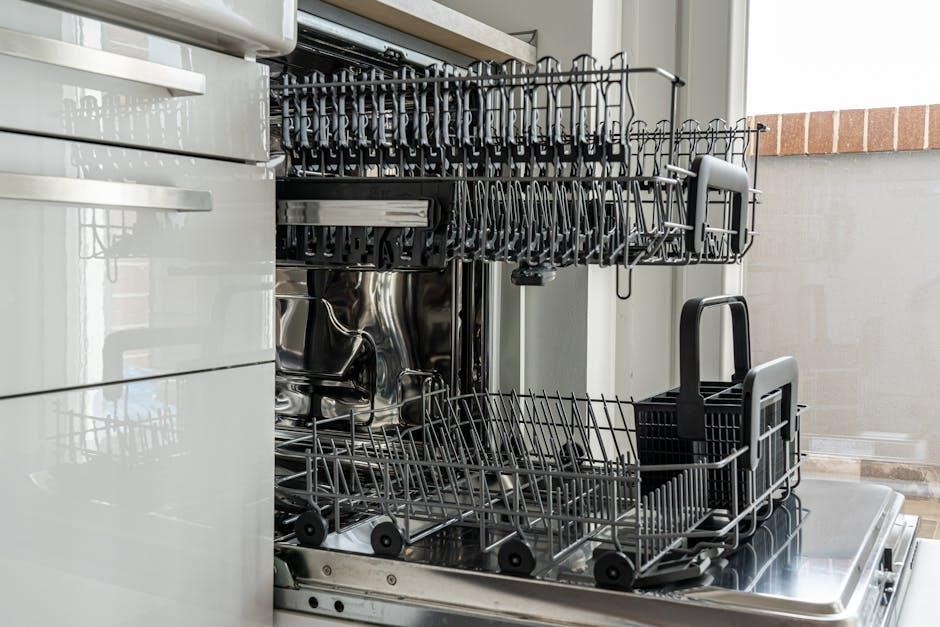
Dishwasher: Many bottles and components are dishwasher-safe (top rack recommended). Check manufacturer’s instructions first. Use a hot water cycle and heated drying.
Cold Water Sterilization: Utilize a sterilizing solution following the product’s guidelines. This method, like partitioning a hard drive with GParted, requires precise adherence to instructions.
Microwave Steam Sterilizers: These offer a quick alternative, but ensure compatibility with your bottle materials;
Always follow safety precautions and manufacturer’s recommendations for each method. Proper sterilization is crucial for infant health.
